Main Support
Scheduling site backups with XCloner
Follow the steps below to schedule and monitor your WordPress backups with XCloner.
- Ensure that you have installed, activated and configured the XCloner plugin as described here.
- Log in to your account at Watchful and view your dashboard. Find the WordPress site you want to edit and click the site name to open the
site drawer. This reveals theTools and Insightsarea. - In the
Toolsarea, click theEditbutton corresponding to the site you configured above for remote backups. This opens theSite Editdialog.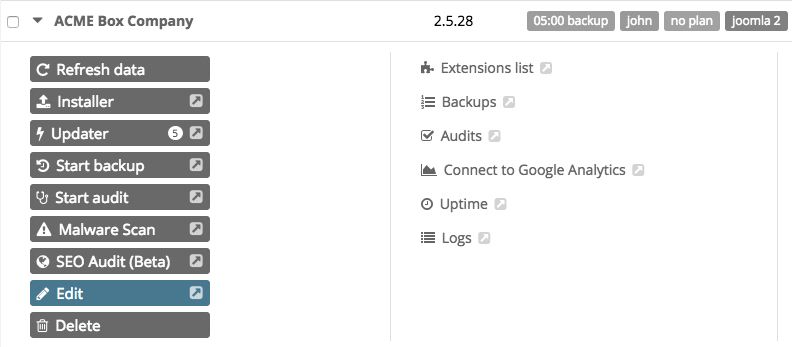
- In the Backup area, select XCloner from the plugin dropdown selector as shown below:
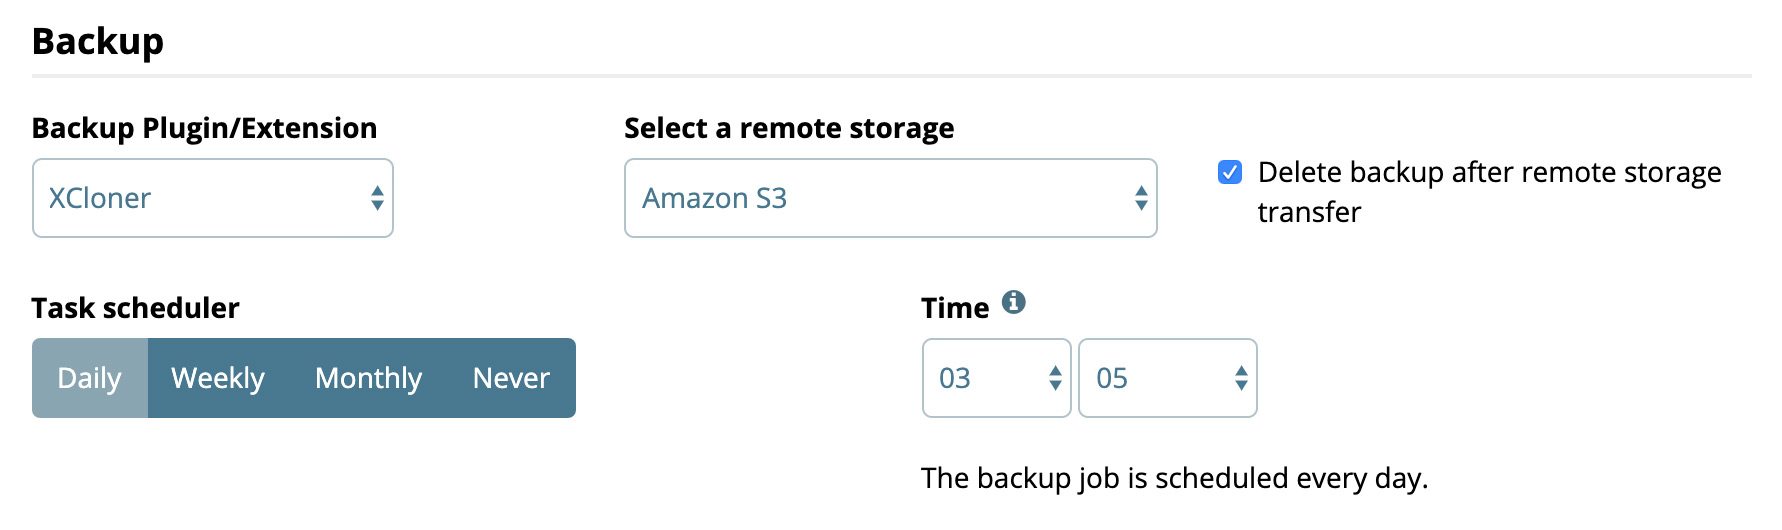
- Select the remote storage location if desired (strongly recommended). You may also choose to delete the local copy of the backup once they have been transferred to the remote location.
- Configure the
Task schedulerfor daily, weekly or monthly backups. If you choose a weekly schedule, you can select specific days to backup. - Specify a backup
Time. The best time to backup is typically the time of day your site has the lowest traffic. - Complete the process by selecting the
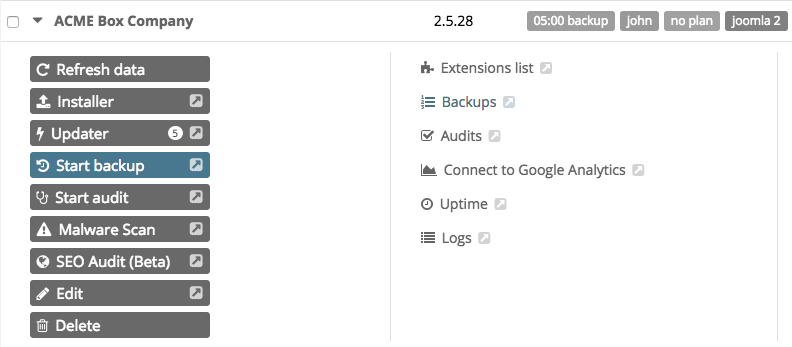
Save & Closebutton at the bottom of theSite Editdialog. This returns you to the open drawer for the site. - In the tools section, test the remote backup process by selecting the
Start Backupbutton in the site drawer.
Search Knowledge base
Most popular
- Add a Joomla website to Watchful
- Add a website to Watchful
- Add a WordPress website to Watchful
- Does Watchful support managed hosts like WP Engine, Flywheel, and Pantheon?
- How do I generate reports for my clients?
- How to add Tags to your WordPress & Joomla websites in Watchful
- How to use the Auto Update Scheduler
- How to use the Auto Updater
- Managing your auto-updating softwares
- Three ways to backup your website with Watchful